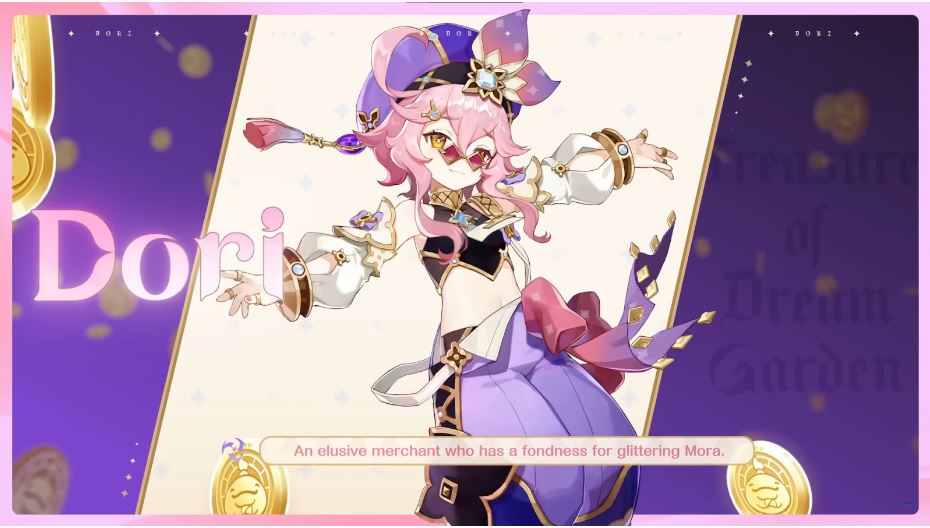
Dori is a four-star Electro character in Genshin Impact and has made her debut in the Sumeru 3.0 update. Dori is one of the first Electro characters that has high synergy with Dendro, enabling new reactions and playstyles for team comps. Dori is mainly a reaction support healer that can be played in a myriad of forms. With the addition of Dendro, existing reactions and teams have gone through drastic changes, and even Dori’s kit on her own is somewhat difficult to grasp. In this Genshin Impact guide, we will talk about all you need to know about Dori, her builds, and the materials required for her ascension.
Dori in Genshin Impact: Character introduction, Playstyle and Skillset
Dori is the owner of The Palace of Alcazarzaray and is also a merchant of high status. Looking upon her stature, she may not look like much, but she is infamous for getting her hands on anything for someone, as long as they have enough Mora to pay her off. Not to mention, the ludicrous prices she offers her clients. In this guide, we will breakdown the skillset of Dori in Genshin Impact.
Dori’s Playstyle and Skillset
| Name/Description | Type |
|---|---|
| Marvelous Sword-Dance | Normal Attack |
| The skill performs up to 3 consecutive strikes. | |
| Charged Attack | |
| Drains Stamina over time to perform continuous spinning attacks against all nearby opponents. At the end of the sequence, performs a more powerful slash. | |
| Plunging Attack | |
| Plunges from mid-air to strike the ground below, damaging opponents along the path and dealing AoE DMG upon impact. | |
| Spirit-Warding Lamp: Troubleshooter Cannon | Elemental Skill |
| Directs a Spirit-Warding Lamp to fire off a Troubleshooter Shot at opponents, dealing Electro DMG. After the Troubleshooter Shot hits, it will create 2 After-Sales Service Rounds that will automatically track opponents and deal Electro DMG. | |
| Alcazarzaray’s Exactitude | Elemental Burst |
| Summons forth the Jinni within the lamp to give the client various kinds of aid. JinniConnects to a nearby character. The connected character will:· Continuously restore HP based on Dori’s Max HP.· Continuously regenerate Energy.· Be affected by Electro. When the connector between the Jinni and the character touches opponents, it will deal one instance of Electro DMG to them every 0.4s. Only one Jinni can exist at one time. |
Dori’s Passive Talents
An Eye for Gold
After a character connected to the Jinni triggers an Electro-Charged, Superconduct, Overloaded, Quicken, Aggravate, Hyperbloom, or an Electro Swirl or Crystallize reaction. The CD of Spirit-Warding Lamp: Troubleshooter Cannon is decreased by 1s. This effect can be triggered once every 3s.
Compound Interest
For every point of Elemental Mastery, Dori possesses, his Charged Attack and Fashioner’s Tanglevine Shaft DMG are increased by 0.06%. The maximum DMG Bonus obtainable this way is 60%.
Unexpected Order
The skill has a 25% chance to recover some of the materials used when crafting Character and Weapon Materials.
Talents Leveling Priority
Elemental Burst > Elemental Skill > Normal Attacks
Dori’s Constellations
In this Genshin Impact Dori guide, we will list down her constellations.
| Constellation Level | Constellation Name | Effect |
|---|---|---|
| C1 | Additional Investment | The number of After-Sales Service Rounds created by Troubleshooter Shots is increased by 1. |
| C2 | Special Franchise | When players are in combat and the Jinni heals the character it is connected to, it will fire a Jinni Toop from that character’s position that deals 50% of Dori’s ATK DMG. |
| C3 | Wonders Never Cease | The skill increases the Level of Alcazarzaray’s Exactitude by 3. The maximum upgrade level is 15. |
| C4 | Discretionary Supplement | The character connected to the Jinni will obtain the following buffs based on their current HP and Energy. When their HP is lower than 50%, they gain the 50% Incoming Healing Bonus: When their Energy is less than 50%, they gain a 30% Energy Recharge. |
| C5 | Value for Mora | The skill increases the Level of Spirit-Warding Lamp: Troubleshooter Cannon by 3. The maximum upgrade level is 15. |
| C6 | Sprinkling Weight | Troubleshooter Cannon: Dori gains the following effects for 3s after using Spirit-Warding Lamp. Electro Infusion: When Normal Attacks hit opponents, all the nearby party members will heal HP equivalent to 4% of Dori’s Max HP. This type of healing can occur once every 0.1s. |
Best Artifacts Build for Dori in Genshin Impact
Main DPS / SUB DPS Build
Dori can be mainly played as a Support character that can either be a Healer or a Reaction buffer. In the healer role, Dori will be purely a healer. For that, she is best equipped with either a 4pc Noblesse Oblige for damage buff on the whole team or a 4pc Ocean-Hued Clam, which will provide some extra damage. Players can also go with Hybrid artifact sets like 2pc like Maiden Beloved + 2pc Ocean-Hued Clam for even more healing.
In Reaction-based teams and Dendro teams, Dori can be either equipped with Deepwood Memories or Gilded Dreams, depending on the other characters in that team. Her entire kit has mixed attributes for EM and HP, which makes her a bit problematic to build, but also gives some freedom for more team comps. Dori can make use of the Gilded Dreams set that compliments her passive talents to further increase the buffs it provides.
In Dendro comps, she can use the Deepwood Memories artifact set. The 2pc effect is useless for her, but the 4pc effect can shred targets’ Dendro resistance by a great margin, and using this set on Dori, can free other characters to have more offensive artifact sets. In this guide, we will list down the artifacts for the best artifact set build for Dori in Genshin Impact.
Artifacts
Ocean-Hued Clam
Set Bonuses
- 2-Piece Bonus: Healing Bonus +15%.
- 4-Piece Bonus: When the character equipping this artifact set heals a character in the party, a Sea-Dyed Foam will appear for 3 seconds, accumulating the amount of HP recovered from healing (including overflow healing).
- At the end of the duration, the Sea-Dyed Foam will explode, dealing DMG to nearby opponents based on 90% of the accumulated healing. (This DMG is calculated similarly to Reactions such as Electro-Charged, and Superconduct, but it is not affected by Elemental Mastery, Character Levels, or Reaction DMG Bonuses).
- Only one Sea-Dyed Foam can be produced every 3.5 seconds.
- Each Sea-Dyed Foam can accumulate up to 30,000 HP (including overflow healing).
- There can be no more than one Sea-Dyed Foam active at any given time.
- This effect can still be triggered even when the character who is using this artifact set is not on the field.
Noblesse Oblige

Set Bonuses
- 2-Piece Bonus: Elemental Burst DMG +20%
- 4-Piece Bonus: Using an Elemental Burst increases all party members’ ATK by 20% for 12s. This effect cannot stack.
Deepwood Memories

Set Bonuses
- 2-Pieces: Dendro DMG Bonus +15%.
- 4-Pieces: After Elemental Skills or Bursts hit opponents, the targets’ Dendro Res will be decreased by 30% for 8s. This effect can be triggered even if the equipping character is not on the field.
Gilded Dreams

Set Bonuses
- 2-Piece Bonus: Elemental Mastery +80
- 4-Piece Bonus: Within 8s of triggering an Elemental Reaction, the character equipping this will obtain buffs based on the Elemental Type of the other party members, ATK is increased by 14% for each party member whose Elemental Type is the same as the equipping character, and Elemental Mastery is increased by 50 for every party member with a different Elemental Type. Each of the aforementioned buffs will count up to 3 characters. This effect can be triggered once every 8s. The character who equips this can still trigger its effects when not on the field.
Artifact Stats Priority
In order to bring the support potential to the maximum for any character, min-maxing will always have the utmost importance. Dori mainly uses her Elemental Burst to heal and provide reaction utility which determines what sub-stat should be prioritized. The healer build will have HP% Sands, HP% Goblet, and Healing Bonus Circlet, whereas the reaction build will have EM Sands, EM Goblet and Circlet can be based on whichever stat you need the most. Players should aim to clear the ER% threshold first, because, in optimal rotations, her burst is very important and is the main utility. Once ER% is not an issue, players must focus on boosting ER% / EM / HP% as required.
Note: If Dori uses Favonius Greatsword, then you should also focus on building enough Crit rate to trigger the weapon’s passive effect that can provide extra energy to the whole team.
Desired Substats: ER% / EM / HP%
| Artifact Type | Main Stat | Sub Stat Priority |
|---|---|---|
| Flower | HP | ER% / EM / HP% > ATK% |
| Plume | ATK | ER% / EM / HP% > ATK% |
| Sands | ER% / EM / HP% | ER% / EM / HP% > ATK% |
| Goblet | HP% / EM | ER% / EM / HP% > ATK% |
| Circlet | Healing Bonus / CR% / CD% | ER% / EM / HP% > ATK% |
ER% requirement for Dori
Dori’s main source of healing comes from her Elemental Burst which has a very high cost and without a dedicated battery, she will require a lot of ER% on her to use the burst more often. The ER% threshold depends on what team comp Dori is used in, but to be on the safe side of things, aim for at least 210+ ER%.
Dori has many choices in the 4-star weapon category for Energy Recharge weapons, which makes it much easier to hit the required threshold.
Best Weapons for Dori
Dori’s Elemental Burst has an energy cost of 80, which means in most scenarios she will require an ER% Claymore to make use of her bust efficiently. Favonius Greatsword and Forest Regalia are very strong choices for her, based on the type of role she will play on the team. For fulfilling the role of a healer, Favonius Greatsword is the best choice. If she is in a Dendro team or a reaction-based team, it is better to use the Forest Regalia, which provides extra buffs, based on Dendro reactions. In this section, we will discuss the best weapons for Dori in Genshin Impact.
Dori can alternately also use weapons like Skyward Claymore and Sacrificial Greatsword, but they won’t be as good as the weapons above due to less synergy with Dori. The Bell is also not a good choice for Dori, as the weapon doesn’t have ER%, as the Sub-stat which would make the Burst recharge faster.
Note: Weapon rankings should only be taken as a reference as damage numbers can skew depending on multiple factors, team comps, characters, artifacts and rotations. So, test your own characters to see what’s the best weapon for them.
Weapon Ranking for Five-Star Weapons
Favonius Greatsword = Forest Regalia > Skyward Claymore = Sacrificial Greatsword > The Bell
Favonius Greatsword
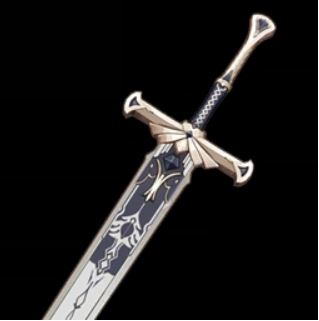
- Base ATK– 454 (Level – 90)
- Substat- 61.3% Energy Recharge
- Weapon Passive: Windfall
CRIT hits have a 60% chance to generate a small amount of Elemental Particles, which will regenerate 6 Energy for the character. Can only occur once every 12s.
Forest Regalia

- Base ATK– 565 (Level – 90)
- Substat- 30.6% Energy Recharge
- Weapon Passive: Forest Sanctuary
After triggering Burning, Quicken, Aggravate, Spread, Bloom, Hyperbloom, or Burgeon, a Leaf of Consciousness will be created around the character for a maximum of 10 s. When picked up, the Leaf will grant the character 60 Elemental Mastery for 12 s. Only 1 Leaf can be generated this way every 20 s. This effect can still be triggered if the character is not on the field. The Leaf of Consciousness effect cannot stack.
Skyward Blade
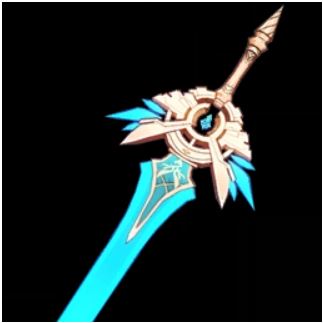
- Base ATK– 608 (Level – 90)
- Substat– 55.1% Energy Recharge
- Weapon Passive: Sky-Piercing Fang
CRIT Rate increased by 4%. Gains Skypiercing Might upon using an Elemental Burst: Increases Movement SPD by 10%, increases ATK SPD by 10%, and Normal and Charged hits deal additional DMG equal to 20% of ATK. Skypiercing Might lasts for 12s.
Sacrificial Greatsword

- Base ATK– 565(Level – 90)
- Substat- 40.6% Energy Recharge
- Weapon Passive: Composed
After dealing damage to an opponent with an Elemental Skill, the skill has a 40% chance to end its own CD. It can only occur once every 30s.
The Bell
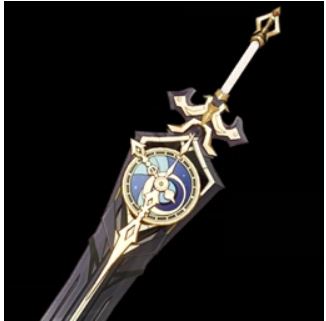
- Base ATK– 510 (Level – 90)
- Substat- 41.3% HP
- Weapon Passive: Rebellious Guardian
Taking DMG generates a shield which absorbs DMG up to 20% of max HP. This shield lasts for 10s or until broken, and can only be triggered once every 45s. While protected by a shield, the character gains 12% increased DMG.
Dori Materials Requirement for Ascension
We will discuss the ascension materials for Dori’s levelling and ascension all the way to max level 90.
| Ascension Level | Ascension Materials |
|---|---|
| Level: 0-20 | 1x Vajrada Amethyst Silver, 3x Faded Red Satin, 3x Kalpalata Lotus, 20k Mora |
| Level: 20-40 | 3x Vajrada Amethyst Fragment, 2x Thunderclap Fruitcore, 15x Faded Red Satin, 10x Kalpalata Lotus, 40k Mora |
| Level: 40-50 | 6x Vajrada Amethyst Fragment, 4x Thunderclap Fruitcore, 12x Trimmed Red Silk, 20x Kalpalata Lotus, 60k Mora |
| Level: 50-60 | 3x Vajrada Amethyst Chunk, 8x Thunderclap Fruitcore, 18x Trimmed Red Silk, 30x Kalpalata Lotus, 80k Mora |
| Level: 60-70 | 6x Vajrada Amethyst Chunk, 12x Thunderclap Fruitcore, 12x Rich Red Brocade, 45x Kalpalata Lotus, 100k Mora |
| Level: 70-80+ | 6x Vajrada Amethyst Gemstone, 20x Thunderclap Fruitcore, 24x Rich Red Brocade, 60x Kalpalata Lotus, 120k Mora |
Talent Upgrade Materials
In this Genshin Impact Dori guide, we will list down the materials required for levelling up skill talents, through each level.
| Level Target | Materials Required |
|---|---|
| Level 1 | – |
| Level 2 | 3x Teachings of Ingenuity, 6x Faded Red Satin, x12500 Mora |
| Level 3 | 2x Guide to Ingenuity, 3x Trimmed Red Silk, x17500 Mora |
| Level 4 | 4x Guide to Ingenuity, 4x Trimmed Red Silk, x25000 Mora |
| Level 5 | 6x Guide to Ingenuity, 6x Trimmed Red Silk, x30000 Mora |
| Level 6 | 9x Guide to Ingenuity, 9x Trimmed Red Silk, x37500 Mora |
| Level 7 | 4x Philosophies of Ingenuity, 4x Rich Red Brocade, 1x Bloodjade Branch, x120000 Mora |
| Level 8 | 6x Philosophies of Ingenuity, 6x Rich Red Brocade, 1x Bloodjade Branch, x260000 Mora |
| Level 9 | 12x Philosophies of Ingenuity, 9x Rich Red Brocade, 2x Bloodjade Branch, x450000 Mora |
| Level 10 | 16x Philosophies of Ingenuity, 12x Rich Red Brocade, 2x Bloodjade Branch, 1x Crown of Insight, x700000 Mora |
Special Dish

- Name: Show Me the Mora
- In-game Description: Dori’s speciality.
After paying a large sum of Mora, players will finally get the chance to taste the dish cooked by Lord Sangemah Bay herself. Firm chicken is covered in silky sauce with a smooth texture. With the mind-controlling charm of its great flavour, this dish is spurring an impulse in the player to spend another fortune just to get another bite!
Food Effect: Increases all party members’ ATK by 274 for 300s. In Co-op Mode, this effect only applies to your own character(s).
What are your thoughts on the Genshin Impact Dori Guide? Do you have any other suggestions mentioned not in our guide, to play as Dori in Genshin Impact? Let us know in the comment section below!
For more Mobile Gaming news and updates, join our WhatsApp group, Telegram Group, or Discord server. Also, follow us on Google News, Instagram, and Twitter for quick updates.
The post Genshin Impact Dori Guide: Best weapons, artifacts and materials required for ascension appeared first on GamingonPhone.
Genshin Impact Dori Guide: Best weapons, artifacts and materials required for ascension
Source: Pinoy DB

0 Comments